Search Fancy-free Crafts Blog

Sunday, April 12, 2015

Spoonflower custom-printed fabric review

Spoonflower printed fabric, new vs. worn
Spoonflower printed fabric: original swatch on left, 3 months use on right
For Christmas this year, I wanted to make a Dr. Who pillowcase for an avid fan. However, I couldn't find any licensed fabric. After some research, I found several threads referring people to Spoonflower, a website where you can order custom printed fabric, wall paper and gift wrap.  Many users have uploaded opensource designs inspired by The Doctor, which are available for anyone to order.

I happily ordered one yard of the higher quality cotton. Overall, I only have good things to say about the ordering process and delivery times. My package came in the mail several weeks later with a nice handwritten note thanking me for my order.

One yard was just enough to make a pillowcase and a matching sleep mask. There was some shrinkage, so make sure you wash and dry your cotton before sewing!

The pillowcase has been in regular use since January (3 months to date), and is washed once per week. For comparison, I matched up a leftover fabric scrap to the worn pillowcase. As you can see, there has been - in my opinion - above average fading.

Edit: After some more research, it appears the fading is to be expected. And probably my own fault.

"For best results, we recommend washing these fabrics with phosphate free detergent in cool or warm water using a gentle or delicate machine cycle. We also suggest washing before use.
 
Some fading as a result of cleaning is typical for these fabrics. This is most notable on darker shades. Front loading washers contribute to color loss due to the increased tumbling action during cleaning. Fading can be minimized through use of cool wash settings and gentle wash cycles."
 
- From the Spoonflower blog, "How to care for your Spoonflower fabrics."
 
I wash my sheets and towels together in a normal cycle using warm water and have a front loading washer. Also, the Dr. Who print was dark, with most of the background black or navy blue. Well then, use me as the example: if you do everything they tell you not to do, at worst you can expect the fabric to fade as much as mine has.
Bird on a branch watercolor wood panel


This one is a quick craft, as it's more coloring than painting. But it was so cute I just couldn't resist!

I picked up this wooden, laser cut bird on a branch at the dollar store for $1.50. It came with hooks already attached at the top. I've done a lot of wood painting using acrylic, but I wanted to do something more natural because this reminded me of spring. Good ol' Gramma had recently given me some ancient, unused art supplies that she unearthed in her basement. Among them were some watercolor pastels, which I had never heard of before.

The box said the watercolor pastels could be used on wood. Perfect!

For the frame, I first tried rubbing the pastels directly onto the wood and going back over the color with a wet brush to bleed the paint out. It worked, but the pigmentation wasn't as dense as desired. In the end, I held the pastel in one hand, loaded the brush with water and scrubbed it against the pastel stick to develop a thick paste. I painted directly onto the wood. This resulted in thicker pigmentation with some of the wood grain still showing through.

For the mottled background, I whetted the wood thoroughly first. I used less paint and blended patches of dark blue, light blue, white and green together. I like the light, soft and hazy look of the background.

I was pleasantly surprised by how vibrant the pink and yellow are. I like the watercolor over acrylic; it's natural looking, doesn't mask the wood's character and the paint has an interesting chalky texture.

As always, I sprayed the painted wood with sealant, tied a string to the hooks and hung it in my office for a touch of spring!

Easter "tree" with vintage decorations

Easter tree with decorations: hare, rabbit, eggs, fairy

I've always loved vases full of gaily coloured branches with miniature Easter decorations hanging from them. It's like a mini-Christmas tree but for spring.

I found a few Easter-themed Victoria-era decorations over at the Graphics Fairy: some hares, chicks going for a drive, Easter eggs, and best of all: an adorable rabbit in a top hat and tie.

I fished a clear plastic to-go box lid out of recycling and got to work. I glued the images to the plastic using Mod Podge and applied a protective coating over top. Using my variable heat tool  and the pointed stencil burning tip, I slowly melted through the plastic and the paper. That was the mistake right there. If I had cut the images down to the desired shape and size beforehand, melting the plastic would have been much easier and faster. Trying to burn though plastic, paper and dried Mod Podge took forever.

If you are looking for a perfect, clean cut edge, this isn't the way to do it. But I liked the brown, chunky edges that resulted.

To hang the decorations, I burned a hole through the top of each and tied a loop of sewing thread.

Monday, April 6, 2015

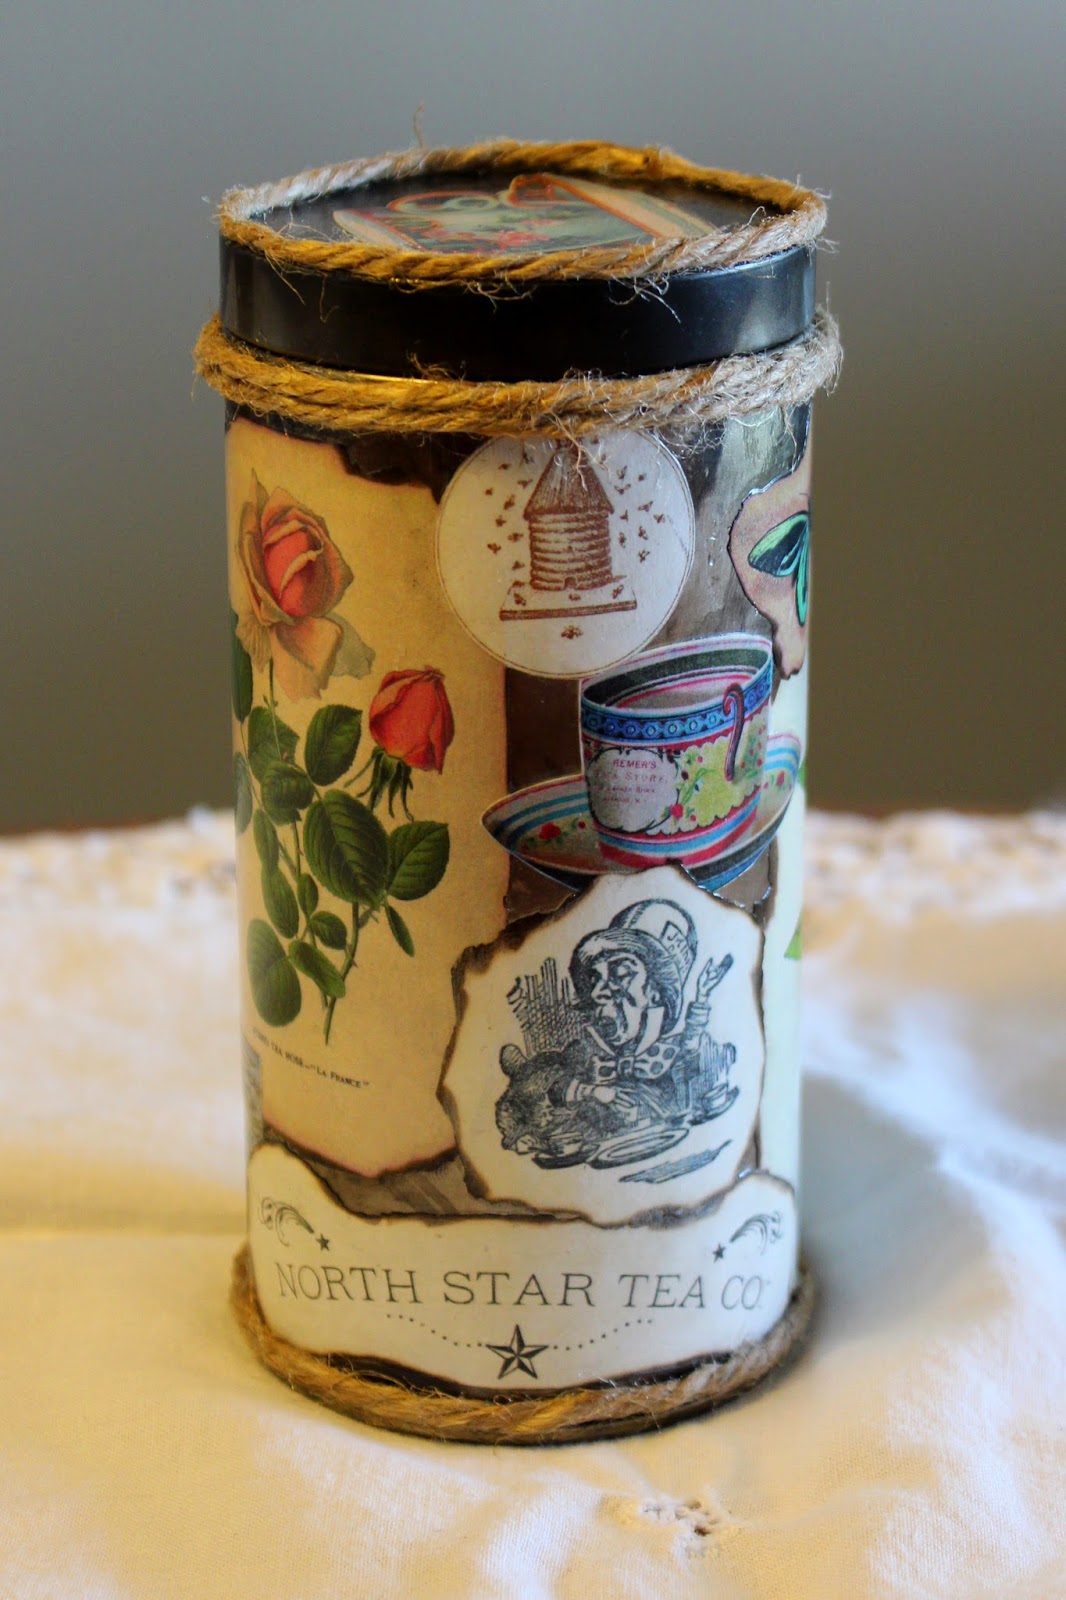
Antique decoupage tea canister

An empty David's Tea canister gets restyled to look vintage.

Step 1: Remove the label
I soaked the canister in hot water and baking soda to remove the sticker label. The paper peeled off easily, but I was left with a layer of tacky residue. Spraying the tin with WD-40 to loosen the adhesive and then washing it off with lots of dish soap and hot water.


Step two: Aging the metal
After some research, it appears that the tea canister metal is covered in a protective coating. Any antiquing chemicals would have to eat through the coating and would be dangerous and corrosive. A message board thread suggested heating the metal over a candle. A better option as it would not eat away at the metal seams or contaminate the inside of the container. I tried the lid first, and heating the metal several times - that was a bit of a flop. The lid turned completely black, when I was going for a more uneven, lightly used look. Not "burnt to a crisp." Lesson learned. For the cannister body I did one complete turn, holding each spot in the candle flame for a few seconds. I then wiped the soot away with a soft cloth. A paper towel left bright scratches as it cut through the patina. For a final touch, I rubbed the metal with a thin coat of mineral oil.
Aging the tea canister

Step 3: Antiquing the decoupage images
I got all of my images from the Graphics Fairy, a fantastic vintage image database of out of copyright images. I simply searched "tea", saved and printed the images in colour.
I recently purchased a wood burning tool that has a variable heat setting. It turns out its the perfect tool for paper burning. On select images I burned the edges away to create more organic shapes. I found my starter tips here. 

Step 4: Decoupage
Grab your Mod Podge and get busy! I applied a decent layer of Mod Podge to the backs of the images and attached them to the canister, smoothing the pictures out from the centre to avoid air bubbles. I let everything dry for an hour.
Glazing white printed pictures
The white printer paper looked far too new and clashed with the other images. I decided to not tea dye the images before doing the collage, as it would cause the paper to warp. It would be impossible to work with. I applied two coats of clear acrylic gel medium mixed with beige liquid acrylic paint. It aged the selected images nicely and was still transparent.

Once dry, I coated everything with a protective layer of Mod Podge, to seal and provide a degree of water resistance. 

Step 4: Decorate and seal
For embellishment, I glued some natural jute twine to the tea canister rim with more Mod Podge. And to remove the tackiness from the Mod Podge, I sprayed the entire outside of the metal tin with acrylic sealant. Voila!

Finished tea canister

Finished tea canister

Finished tea canister