Step 1: Cut out several pieces of fabric and double sided fusible interfacing.
Pro tip: I opted to do 4 layers of fabric, fused together with three layers of interfacing. That was far too many layers, I would recommend two, maximum three layers. Four layers was too difficult to sew through. My machine kept dropping stitches. Also, the interfacing bubbled when wrapped around the wrist.
Step 2: Iron your double sided fusible interfacing onto three of the fabric pieces. Leave one piece of fabric as is. Peel off the paper backing and layer one fabric piece underneath the plain fabric rectangle. Iron according to interfacing instructions and adhere both layers together. Repeat for all layers, creating a thick plank of rectangles fused together by the interfacing.
I divided the wrist cuff into thirds horizontally and sewed two rows of stitching to keep all of the layers together when the cuff was bent around the wrist.
Step 3: Trace out a cover piece, to hide the raw edges. I left one inch of seam allowance.
Step 4: Fold over twice to create a rolled hem. Setting the creases with an iron makes it easier to neatly fold the corners.
Step 5: There was no way pins were getting through that many stiff layers of fabric. Trim the wrist cuff to fit snugly in the cover. I used masking tape to secure the hem. Sew around the edges to secure.
Step 6: Measure and trim Velcro. Wrap cuff around your wrist and mark with pencil how tight you would like cuff to be. Sew one Velcro piece on inside of wrist cuff and matching piece of Velcro to outside of cuff.
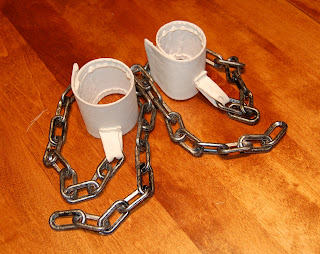
Step 7: I used this plastic Dollar Store decoration for the dangling chains. Most home hardware stores also sell a variety of chains by length. Remove eyeballs and cut one chain link out to separate chain into two equal lengths.
Step 8: Sew a long, thin tube. Loop through the end chain link and top stitch both ends to the outside of your wrist cuff.
Pro tip: I sewed my chains onto the same place on both cuffs. Remember that the left hand and right hand are mirror images of each other. On one arm my chain lay to the inside of the wrist, while on the other arm it lay to the outside of the wrist. Annoying!
That's it!


No comments:
Post a Comment